
How to Remove Burnt Residue From Pots and Pans
Burnt residue can make your pan look like it belongs in a museum, complete with a sign saying, ‘evidence of early human cooking.’
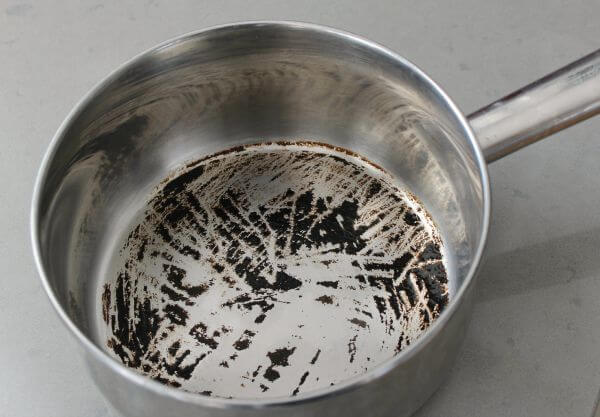
It’s tempting to give up and start shopping for a shiny new replacement, but don’t write it off just yet. Most of the time, all it takes is the right method and a little patience to peel back the charred layers and reveal your trusty pan underneath.
Stick with us, and we’ll show you exactly how to do it without endless scrubbing or fancy sprays.
Assess the Damage
Before grabbing anything, take a second to check the situation. Not all burnt messes are created equal.
Sometimes, it’s just a faint scorch mark that needs little more than soap and warm water. Other times, it’s a thick, black crust that looks like it could survive an apocalypse.
It’s also important to consider the type of pan you’re using. Stainless steel can handle more wear and tear compared to non-stick surfaces.
Cast iron, on the other hand, is in a league of its own. It’s tough, yes, but if you soak it too long, you’ll invite rust to the party.
That little bit of know-how can be the difference between a successful cleaning session and one that ends in disaster. Without it, scratches, warped bases, and peeling coatings are all too common, and they’re far tougher to fix than a bit of burnt food.
Choose the Right Cleaner
Once you’ve figured out what kind of problem you’re dealing with, it’s time to pick your weapon of choice.
That said, keep in mind that there’s no point reaching for a heavy-duty product when a gentler option will do the trick.
For light smudges, DIY cleaners like baking soda, white vinegar, or even coarse salt can break down residue without harming the surface.
However, tougher cases need more muscle. Commercial products exist for this exact reason, and they work like a charm—just check that they’re safe for the pan’s surface.
In any case, steer clear of bleach or ammonia, since they can be too harsh for delicate cookware and can cause discolouration or damage over time.
And if your pan is non-stick, you’ll want to be extra careful. One overzealous spray and that slick finish might never be the same again.
Soak the Cookware
Sometimes, the simplest solution really is the best. Before you break out the big guns, try letting hot, soapy water do the heavy lifting. Pour some in the pan, let it sit for at least 30 minutes, and then check if anything has loosened up.
That said, this isn’t one-size-fits-all. For example, soaking non-stick pans for too long isn’t the best move, as too much time in the water can shorten their lifespan.
Cast iron is even fussier. If you let it sit too long, this can cause rust, so keep the water to a minimum and dry it thoroughly straight after. For stainless steel, longer soaking is usually safe and helps with tough, burnt bits.
Clean Without Wrecking the Pan
Once you’re done soaking your pot, it’s time to roll up your sleeves. But here’s the golden rule: Don’t go at it like you’re sanding a floorboard. Heavy scrubbing can do more harm than good, especially when you’re dealing with non-stick, ceramic, or enamelled pans.
Instead, use a sponge and some warm water, applying minimal pressure to remove the scorched bits.
If burnt food sticks like glue, mix baking soda with a little water and spread a thick layer of this paste. Then, let it sit for 15 to 20 minutes. That will give it time to break down the gunk, so there’ll be no need for harsh scrubbing.
Still no luck? Bring on the heat. Pour in equal parts vinegar and water, boil it for a few minutes, and let that acidic steam loosen up the grime. Once cool, wipe it all out with a sponge or cloth.
Some cases need extra grit. Sprinkle coarse salt on a damp sponge and scrub gently. It’ll add just enough abrasion without harming the surface. This works well for stainless steel, but skip this on delicate finishes.
And as tempting as steel wool or metal scrubbers might be, avoid using them unless the pan is pure metal with no coating. Most cookware can’t handle it. A nylon scrubber is a safer bet if more pressure is needed.
However, if this sounds too complex or you’re pressed for time, consider calling in a housemaid service.
This way, you can say goodbye to guessing games and scrubbing until your arms give out. They walk in with the right tools, the right products, and the kind of experience that makes even the grimiest pans look brand new.
Prevent Future Burnt Residue
Now that your pan is clean again, the best thing you can do is stop the next mess before it starts.
Burnt-on residue usually comes down to two things: too much heat or not enough liquid. So, turn down the heat when cooking. Lower temperatures mean less chance of food welding itself to the surface.
A light coat of oil or water at the bottom can stop food from sticking to your cookware. And yes, even non-stick pans benefit from a little extra buffer every now and then.
Another smart habit is to clean up your pots right after cooking. Leftover grime hardens as it cools, so a quick rinse or gentle wipe while the pan is still warm will make everything easier. Just wait a few minutes after removing them from the heat—no need to burn your hand.
These little tweaks don’t take much effort, but they’ll save you from the kind of scrubbing session that makes you question all your life choices.
Conclusion
Sure, your pan might look tragic in the moment, but it’s nothing you can’t handle. So, don’t let a bit of burnt food make you commit to a life of takeaway.
Try out one of these methods and give that crusty mess a run for its money. Who knows, you might even end up bragging about your pan-rescuing skills next time you have dinner with friends.
- Professional Composite Decking Installers in Cardiff: Why Choose Experts
 When looking to improve your outside space, composite decking in Cardiff is a pretty popular… Read more: Professional Composite Decking Installers in Cardiff: Why Choose Experts
 - What to Look for in a Quality Vape Brand: Why Packman Vapes Stand Out
 Choosing the right vape brand can be challenging, especially with the growing number of options… Read more: What to Look for in a Quality Vape Brand: Why Packman Vapes Stand Out
 - How London Homeowners Can Create a Stylish and Functional Kitchen
 In many modern homes, the kitchen has become far more than just a place to… Read more: How London Homeowners Can Create a Stylish and Functional Kitchen
 - Beyond the Basics: The Specialized Services Modern Home Inspection Companies Offer
 When it comes to evaluating a property’s condition, the traditional home inspection has long been… Read more: Beyond the Basics: The Specialized Services Modern Home Inspection Companies Offer
 - Choosing the Right Commercial Flooring Solutions for Sydney Businesses
 Picking the right flooring is a crucial choice in any commercial build or renovation. In… Read more: Choosing the Right Commercial Flooring Solutions for Sydney Businesses

Professional Composite Decking Installers in Cardiff: Why Choose Experts

How London Homeowners Can Create a Stylish and Functional Kitchen

Beyond the Basics: The Specialized Services Modern Home Inspection Companies Offer

Choosing the Right Commercial Flooring Solutions for Sydney Businesses

A Tranquil Escape in the City

Therapeutic Foster Care: Specialised Support for Children Who Need It Most

Retail Therapy and Boutique Shopping Near Zyon Grand
