Author: Sarah Sadie

  • Balboa Mist: The Timeless Elegance of a Subtle Gray

    Balboa Mist: The Timeless Elegance of a Subtle Gray

    Introduction:

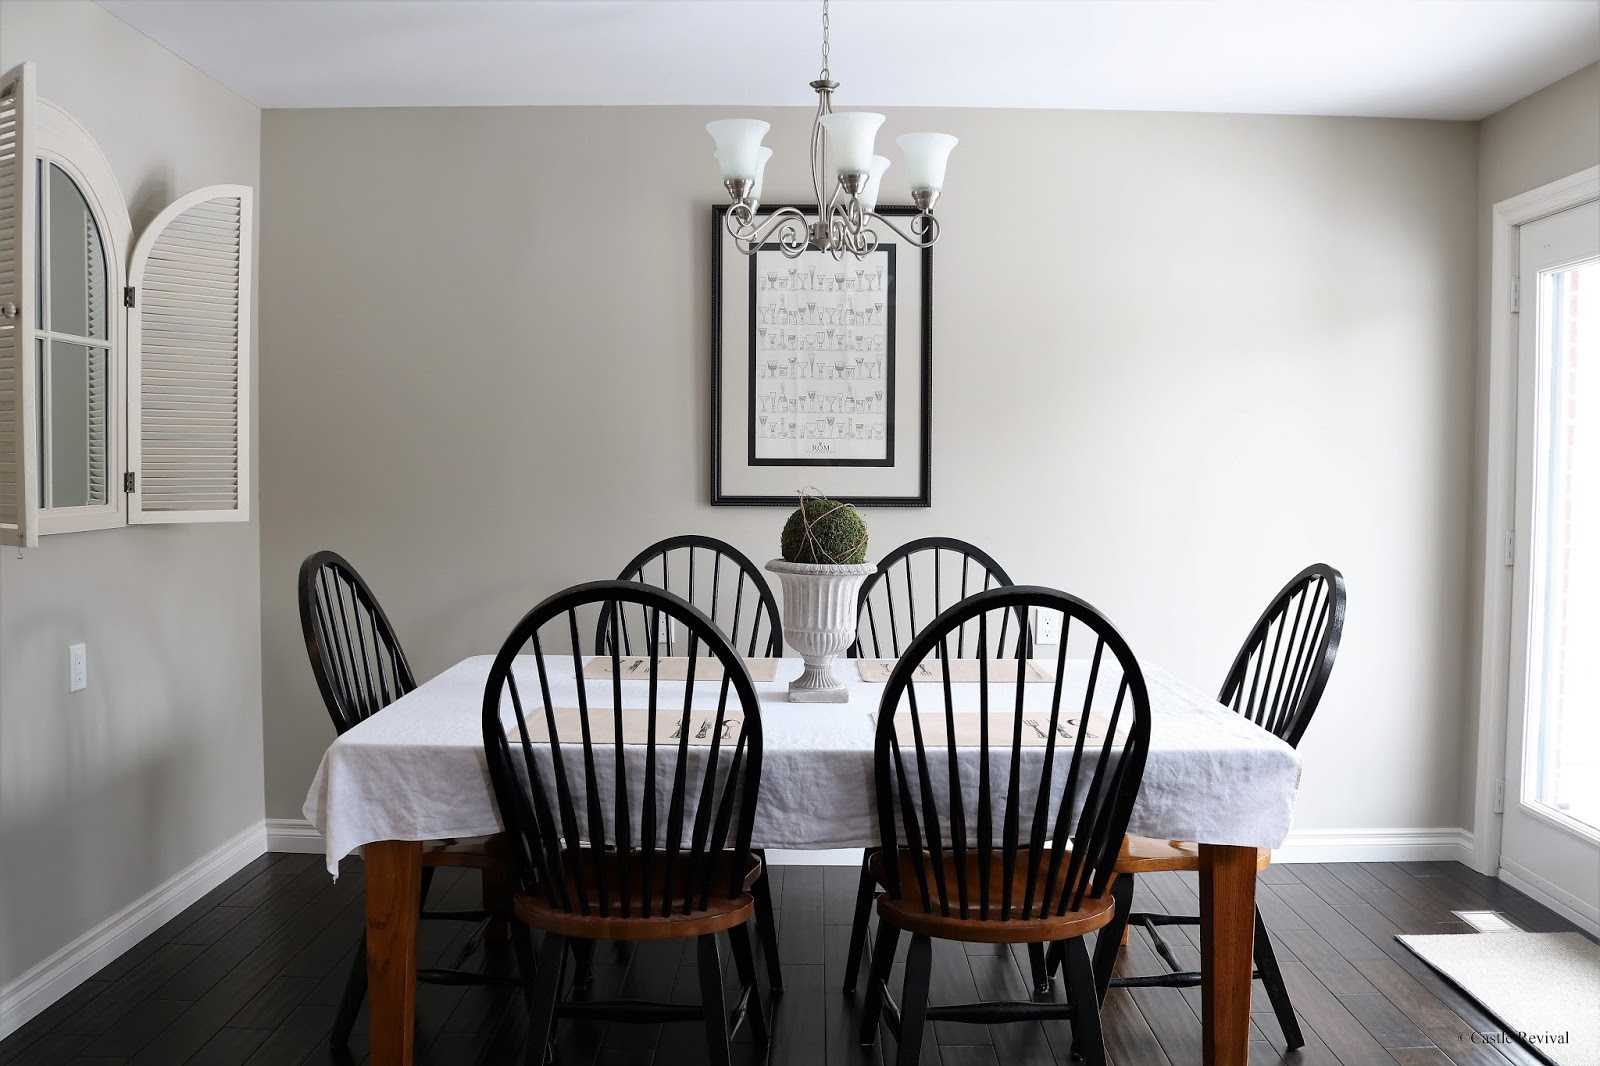
    When it comes to choosing a paint color that exudes sophistication and versatility, Balboa Mist by Benjamin Moore is a top contender. This soft and subtle gray has gained popularity among homeowners and designers for its ability to create a timeless and elegant look. In this article, we will explore the allure of Balboa Mist, uncovering its unique qualities and explaining why it has become a go-to choice for those seeking a refined and neutral color palette.

    The Allure of Balboa Mist:

    1. Subtle Sophistication:

    Balboa Mist offers a sophisticated and understated elegance that instantly elevates any space. Its soft gray undertones create a calming and serene atmosphere, making it an excellent choice for bedrooms, living rooms, and other gathering areas. Unlike bolder grays, Balboa Mist exudes a subtle charm that complements a wide range of design styles, from traditional to contemporary.

    1. Versatility:

    One of the most remarkable qualities of Balboa Mist is its versatility. This neutral gray hue effortlessly blends with various color palettes and design elements. It serves as a beautiful backdrop for both warm and cool color schemes, making it an ideal choice for those seeking a flexible and adaptable color palette. Balboa Mist acts as a blank canvas, allowing you to showcase other design elements while maintaining a cohesive and harmonious look.

    1. Timeless Appeal:

    Balboa Mist boasts a timeless appeal that transcends passing design trends. Its classic and understated beauty ensures that it remains relevant and elegant for years to come. Whether used on walls, trim, or cabinetry, Balboa Mist provides a timeless backdrop that allows for easy updates and modifications to your space. Its enduring allure makes it a popular choice for those seeking a long-lasting and sophisticated aesthetic.

    1. Light Reflectivity:

    Balboa Mist possesses excellent light-reflective properties, enhancing the natural and artificial light in a room. This quality helps to create a brighter and more open feel, making it particularly advantageous for spaces with limited natural light or smaller rooms. Balboa Mist has the ability to transform a space by infusing it with a refreshing and airy ambiance, making it appear more spacious and inviting.

    1. Pairing Possibilities:

    The neutral nature of Balboa Mist allows for endless pairing possibilities with various colors and finishes. It harmonizes beautifully with both warm and cool neutrals, creating a balanced and inviting space. For a monochromatic look, it can be paired with other shades of gray, creating depth and dimension. Alternatively, it can be paired with bolder colors to create a striking contrast and focal point. Balboa Mist offers versatility and allows for personalization and customization according to your design preferences.

    Conclusion:

    Balboa Mist by Benjamin Moore is a timeless and versatile shade of gray that brings subtle elegance to any space. Its subtle sophistication, versatility, timeless appeal, light-reflective properties, and pairing possibilities make it a favorite among homeowners and designers alike. Whether used in bedrooms, living rooms, or kitchens, Balboa Mist creates a serene and refined atmosphere that stands the test of time. Embrace the timeless elegance of Balboa Mist and transform your space into a haven of understated beauty and sophistication.

  • Embracing the Sun: Exploring the Radiant Yellow Color Palette

    Embracing the Sun: Exploring the Radiant Yellow Color Palette

    Introduction:

    When it comes to adding vibrancy and cheerfulness to any space, few colors can rival the radiance of yellow. The yellow color palette offers a wide range of shades, from soft and subtle to bold and vibrant, allowing for endless possibilities in design and decor. In this article, we will delve into the allure of the yellow color palette, uncovering its unique qualities and explaining why it has become a popular choice for those seeking a bright and uplifting ambiance.

    The Allure of the Yellow Color Palette:

    1. Energy and Positivity:

    Yellow is often associated with energy and positivity. It exudes a sense of happiness and optimism, making it an excellent choice for creating a vibrant and uplifting environment. Whether used as a main color or as an accent, the yellow color palette infuses a space with a burst of energy and adds a touch of sunshine to even the dullest corners. It’s the perfect choice for spaces where you want to create a lively and inviting atmosphere.

    1. Versatility:

    The yellow color palette offers a wide range of shades, each with its own unique personality. From soft pastels to bold citrus tones, there is a yellow shade to suit every design style and preference. Soft yellows can create a calm and serene ambiance, while brighter yellows bring a sense of vibrancy and excitement. The versatility of the yellow color palette allows you to tailor the intensity and mood of a space to your liking.

    1. Creativity and Inspiration:

    Yellow is often associated with creativity and inspiration. It stimulates the mind and encourages new ideas and innovative thinking. Incorporating yellow into your space can spark creativity and provide a fresh perspective. Whether used in an office, a creative studio, or a children’s playroom, the yellow color palette sets the stage for imagination and innovation to flourish.

    1. Warmth and Coziness:

    Yellow hues have a natural warmth that creates a cozy and inviting atmosphere. From soft buttery yellows to rich ochre tones, yellow adds a touch of warmth and comfort to any space. It can make a room feel more intimate and welcoming, particularly in areas like living rooms, dining rooms, and bedrooms. The yellow color palette embraces a sense of home and creates a cozy haven for relaxation and gathering.

    1. Complementary Pairings:

    Yellow pairs exceptionally well with various colors, allowing for endless pairing possibilities. It harmonizes beautifully with neutrals like whites, grays, and beiges, creating a balanced and elegant look. For a bold and vibrant aesthetic, yellow can be paired with contrasting colors like blues or purples to create a captivating and dynamic contrast. The yellow color palette offers the opportunity to play with different combinations and create a truly personalized and unique space.

    Conclusion:

    The yellow color palette brings energy, positivity, and warmth to any space it graces. Its versatility, ability to inspire creativity, and range of shades make it a popular choice for homeowners and designers alike. Whether used in soft and subtle pastels or bold and vibrant hues, yellow adds a touch of radiance and joy to any room. Embrace the sun-kissed beauty of the yellow color palette and transform your space into a haven of vibrant energy and warmth.

  • Agreeable Gray Paint: The Perfect Blend of Warmth and Neutrality

    Agreeable Gray Paint: The Perfect Blend of Warmth and Neutrality

    Introduction:

    When it comes to selecting a paint color that effortlessly blends with various design styles and provides a warm and inviting atmosphere, Agreeable Gray is a top contender. This versatile shade by Sherwin-Williams has gained popularity among homeowners and interior designers for its ability to create a harmonious and balanced look. In this article, we will explore the allure of Agreeable Gray paint, uncovering its unique qualities and explaining why it has become a go-to choice for those seeking a welcoming and versatile color palette.

    The Allure of Agreeable Gray Paint:

    1. Warmth and Neutrality:

    Agreeable Gray strikes the perfect balance between warmth and neutrality. As a warm gray with beige undertones, it offers a comforting and inviting ambiance to any space. Unlike cooler grays, which can sometimes feel stark, Agreeable Gray exudes a sense of warmth and coziness. This makes it an excellent choice for creating a welcoming environment in living rooms, bedrooms, and other gathering areas.

    1. Versatility:

    One of the most remarkable qualities of Agreeable Gray is its versatility. This shade adapts effortlessly to various design styles, from traditional to contemporary. Whether your aesthetic leans towards farmhouse, coastal, or minimalist, Agreeable Gray serves as a reliable and adaptable backdrop. It complements both warm and cool color schemes, making it an ideal choice for those seeking a versatile and timeless palette.

    1. Light Reflectivity:

    Agreeable Gray possesses excellent light-reflective properties, which can help brighten up a space. Its ability to reflect light enhances natural and artificial lighting, creating a more open and airy feel. This quality is particularly advantageous in rooms with limited natural light or smaller spaces where a sense of spaciousness is desired. Agreeable Gray adds a touch of brightness and vitality to any room it graces.

    1. Pairing Possibilities:

    The neutral nature of Agreeable Gray allows it to pair seamlessly with various colors and finishes. It serves as a versatile canvas that enhances both bold and subtle accent hues. For a classic and sophisticated look, it pairs exceptionally well with crisp whites and deep grays. If you prefer a more vibrant aesthetic, it can be paired with jewel tones or pops of bold color to create a captivating contrast. Agreeable Gray offers endless possibilities for personalization and customization.

    1. Timeless Appeal:

    Agreeable Gray has proven its staying power in the design world, remaining a popular choice for many years. Its timeless appeal stems from its ability to blend with various styles and withstand changing design trends. It provides a neutral foundation that can easily adapt to different design elements and accessories. By choosing Agreeable Gray, you can create a space that stands the test of time, ensuring its enduring elegance for years to come.

    Conclusion:

    Agreeable Gray paint by Sherwin-Williams is a versatile and inviting shade that strikes the perfect balance between warmth and neutrality. Its ability to create a welcoming atmosphere, versatility in pairing with other colors, light-reflective properties, and timeless appeal make it a favorite among homeowners and designers alike. Whether used in living areas, bedrooms, or hallways, Agreeable Gray provides a harmonious backdrop that enhances the overall aesthetic of a space. Embrace the warmth and versatility of Agreeable Gray and transform your home into a haven of balanced beauty and style.

  • SW Alabaster: The Timeless Beauty of Pure White

    SW Alabaster: The Timeless Beauty of Pure White

    Introduction:

    When it comes to creating a fresh and inviting space, few colors can rival the elegance and versatility of SW Alabaster. This pure white shade by Sherwin-Williams has become a go-to choice for homeowners and designers alike, offering a timeless aesthetic that can transform any room. In this article, we will explore the allure of SW Alabaster, uncovering its unique qualities and explaining why it has become a staple color for those seeking a classic and sophisticated look.

    The Allure of SW Alabaster:

    1. Timeless Elegance:

    SW Alabaster exudes timeless elegance, making it a popular choice for those seeking a clean and sophisticated aesthetic. This pure white shade provides a neutral foundation that effortlessly blends with any style or color scheme. Whether used on walls, trim, or cabinets, SW Alabaster creates a timeless and cohesive look that stands the test of time. Its simplicity and versatility allow it to adapt to various design styles, from traditional to contemporary.

    1. Versatility:

    One of the remarkable qualities of SW Alabaster is its versatility. This shade of white complements both warm and cool color palettes, making it a versatile choice for any space. It pairs beautifully with soft pastels, creating a serene and dreamy atmosphere. Additionally, it serves as an excellent backdrop for bolder and vibrant colors, allowing them to stand out and make a statement. SW Alabaster provides endless possibilities for customization and personalization.

    1. Light Reflectivity:

    SW Alabaster possesses excellent light-reflective properties, enhancing natural and artificial light in a room. This quality makes it an excellent choice for spaces with limited natural light or smaller rooms that require a sense of openness. By reflecting light, SW Alabaster brightens up a space, creating an airy and inviting atmosphere. It brings a sense of freshness and vitality, making the room feel more spacious and vibrant.

    1. Tranquility and Serenity:

    White is often associated with tranquility and serenity, and SW Alabaster is no exception. This pure white shade promotes a sense of calmness and relaxation, allowing you to create a peaceful sanctuary within your home. It provides a neutral and soothing backdrop that helps to create a serene and inviting atmosphere. Whether used in bedrooms, bathrooms, or living areas, SW Alabaster sets the stage for tranquility and harmony.

    1. Accentuates Architectural Details:

    SW Alabaster has the power to accentuate the architectural details of a space. When applied to trim, doors, or moldings, it creates a crisp and clean contrast, highlighting the intricate features of a room. It adds depth and dimension, drawing attention to the craftsmanship and design elements. SW Alabaster allows you to showcase the unique architectural details of your space, elevating its overall aesthetic appeal. In both residential and professional spaces—from cozy homes to sleek GRP cabinets in commercial environments—SW Alabaster provides a crisp, timeless touch that enhances structure and design.

    Conclusion:

    SW Alabaster by Sherwin-Williams is a timeless and versatile shade of white that brings elegance and sophistication to any space. Its timeless beauty, versatility, light-reflective properties, and ability to accentuate architectural details make it a favorite among homeowners and designers. Whether used as a main color or as a complementary backdrop, SW Alabaster creates a fresh and inviting atmosphere that stands the test of time. Embrace the purity and elegance of SW Alabaster and transform your space into a sanctuary of timeless beauty and sophistication.

  • Sherwin Williams Rainwashed: Transform Your Space with Tranquil Blue-Green

    Sherwin Williams Rainwashed: Transform Your Space with Tranquil Blue-Green

    Introduction:

    In the realm of interior design, finding the perfect balance between serene and refreshing can be a challenge. However, Sherwin-Williams has successfully captured this delicate harmony with its exquisite shade, Rainwashed. This captivating blue-green hue has become a favorite among homeowners and designers for its ability to create a soothing and tranquil atmosphere. In this article, we will explore the allure of Sherwin-Williams Rainwashed, uncovering its unique qualities and explaining why it has become a go-to choice for those seeking a serene and rejuvenating space.

    Discovering Sherwin Williams Rainwashed:

    1. Serene and Tranquil:

    Rainwashed is a color that effortlessly captures the essence of a calming oasis. This soft and delicate blue-green hue evokes a sense of tranquility and relaxation, making it ideal for bedrooms, bathrooms, and living areas. Its soothing undertones create a serene atmosphere, allowing you to escape the stresses of everyday life and find solace within your own home. Rainwashed sets the stage for a peaceful retreat where you can unwind and rejuvenate.

    1. Versatile and Adaptable:

    One of the remarkable qualities of Rainwashed is its versatility. This versatile shade of blue-green blends seamlessly with various design styles, from coastal and beach-inspired to contemporary and traditional. It complements both neutral and bold color schemes, providing a versatile backdrop for furniture, artwork, and other decorative elements. Rainwashed can be the star of the show or a calming complement to other design elements, allowing you to personalize your space with ease.

    1. Nature-Inspired Aesthetic:

    Rainwashed draws inspiration from nature, reflecting the calming hues found in coastal landscapes and tropical waters. This connection to the natural world brings a sense of tranquility and harmony into your home. The gentle blue-green tones create a soothing environment reminiscent of clear skies and tranquil seas. By incorporating Rainwashed into your space, you can infuse a touch of nature’s serenity into your daily life.

    1. Light-Reflective Properties:

    Another appealing feature of Rainwashed is its ability to reflect light. The soft and subtle sheen of this color enhances natural and artificial light, making a room feel brighter and more open. This quality is particularly advantageous for spaces with limited natural light or smaller rooms where creating a sense of spaciousness is desired. Rainwashed has the power to transform a space by infusing it with a refreshing and airy ambiance.

    1. Pairing Possibilities:

    Rainwashed harmonizes beautifully with a wide range of colors, offering endless pairing possibilities. It complements warm neutrals like sandy beiges and soft creams, creating a balanced and inviting space. For a more dramatic effect, Rainwashed can be paired with rich navy blues or deep grays, adding depth and sophistication. Whether you prefer a monochromatic scheme or a vibrant contrast, Rainwashed provides a versatile foundation for your creative vision.

    Conclusion:

    Sherwin Williams Rainwashed has proven to be an exceptional color choice for those seeking a tranquil and rejuvenating space. Its serene and calming qualities, versatility, and nature-inspired aesthetic make it a favorite among homeowners and designers alike. Whether used in bedrooms, bathrooms, or living areas, Rainwashed creates a soothing atmosphere that allows you to unwind and find solace in the comfort of your own home. With its light-reflective properties and versatile pairing options, Rainwashed offers endless design possibilities to bring your vision to life. Transform your space into a serene oasis with Sherwin-Williams Rainwashed and experience the refreshing tranquility it brings to your everyday life.

  • Revere Pewter Benjamin Moore: The Timeless Elegance of Gray

    Revere Pewter Benjamin Moore: The Timeless Elegance of Gray

    Introduction:

    When it comes to choosing the perfect gray paint color for your home, one shade that stands out as a timeless classic is Revere Pewter by Benjamin Moore. This versatile and sophisticated hue has gained popularity among homeowners and interior designers alike for its ability to transform any space into a tranquil and elegant haven. In this article, we will explore the allure of Revere Pewter, highlighting its unique qualities and explaining why it has become a go-to choice for those seeking a refined and contemporary look.

    The Allure of Revere Pewter:

    1. Versatility:

    Revere Pewter is renowned for its versatility, making it suitable for a wide range of interior styles. This shade of gray possesses a warm undertone, which sets it apart from cooler grays. It effortlessly complements both traditional and modern decor, creating a balanced and inviting atmosphere. Whether used as a wall color, an accent, or as a backdrop for other design elements, Revere Pewter adapts to its surroundings, creating a harmonious and cohesive look.

    1. Timeless Elegance:

    One of the key reasons for Revere Pewter’s enduring popularity is its timeless elegance. This shade strikes the perfect balance between warm and cool tones, creating a soft and sophisticated ambiance. Unlike other trendy grays that may quickly go out of style, Revere Pewter has proven its longevity. It seamlessly blends with various color palettes and decor styles, making it a reliable choice for those seeking a timeless and enduring aesthetic.

    1. Light Reflectivity:

    Another remarkable characteristic of Revere Pewter is its ability to reflect light. This quality makes it an excellent choice for spaces with limited natural light or smaller rooms that require a sense of openness. Revere Pewter has a subtle luminosity that adds depth and dimension to a space, making it appear larger and more inviting. The color adapts to different lighting conditions throughout the day, showcasing its versatility and adaptability.

    1. Complementary Pairings:

    Revere Pewter’s neutrality allows it to effortlessly pair with various colors, creating stunning combinations. It harmonizes beautifully with both warm and cool hues, providing endless possibilities for creating a cohesive color scheme. For a classic look, Revere Pewter pairs exceptionally well with crisp white trim and accents, creating a timeless and elegant contrast. It also complements earthy tones, blues, and greens, adding depth and sophistication to any space.

    1. Benjamin Moore Quality:

    As a product of Benjamin Moore, Revere Pewter boasts the high quality and performance associated with the brand. Benjamin Moore is renowned for its commitment to excellence, producing premium paints that offer superior coverage, durability, and color accuracy. Revere Pewter is no exception, providing excellent coverage and a smooth finish that withstands the test of time. Its low VOC formula ensures minimal odor and environmental impact, making it a safe and sustainable choice.

    Conclusion:

    Revere Pewter Benjamin Moore has rightfully earned its place as a revered gray paint color in the design world. Its versatility, timeless elegance, light reflectivity, and ability to pair seamlessly with other colors make it a top choice for homeowners and interior designers. Whether used in traditional or modern spaces, Revere Pewter adds depth, warmth, and sophistication, creating a tranquil and refined environment. With Benjamin Moore’s commitment to quality, Revere Pewter ensures excellent coverage and durability, making it a reliable investment for any interior project. Embrace the understated beauty of Revere Pewter and transform your space into a sanctuary of style and grace.

  • redend point sherwin williams: A Sherwin-Williams Innovation in Coating Technology

    redend point sherwin williams: A Sherwin-Williams Innovation in Coating Technology

    Introduction:

    Sherwin-Williams, a renowned leader in the global coatings industry, continues to push the boundaries of innovation with its latest breakthrough: Redend Point. This cutting-edge coating technology represents a significant advancement in the industry, offering exceptional durability, enhanced aesthetics, and unparalleled protection for a wide range of surfaces. In this article, we will delve into the features and benefits of Redend Point, showcasing why it has become a game-changer in the world of coatings.

    Unveiling Redend Point:

    Redend Point is a revolutionary coating solution developed by Sherwin-Williams, known for its commitment to quality and performance. Designed to withstand the most demanding environments, this innovative product provides exceptional protection against corrosion, UV radiation, and chemical exposure. With Redend Point, surfaces retain their vibrant color, gloss, and smooth finish over an extended period.

    Key Features and Benefits:

    1. Superior Durability: Redend Point exhibits remarkable durability, making it ideal for both interior and exterior applications. It resists scratches, abrasions, and impact, ensuring surfaces remain in pristine condition even in high-traffic areas. This durability minimizes maintenance requirements and extends the lifespan of coated surfaces, saving time and money in the long run.
    2. Enhanced Aesthetics: The advanced formulation of Redend Point delivers a visually stunning finish. Available in a wide range of colors and finishes, including glossy, satin, and matte, it allows for customization to meet various design requirements. Whether applied to metal, wood, or concrete, Redend Point provides a smooth and flawless appearance that enhances the visual appeal of any surface.
    3. Excellent Adhesion: Redend Point boasts exceptional adhesion properties, ensuring it adheres firmly to different substrates. This feature is especially crucial for challenging surfaces prone to peeling or flaking. Redend Point forms a strong bond, providing long-lasting protection and preventing premature coating failure.
    4. Resistance to Environmental Factors: Redend Point is engineered to withstand the harshest environmental conditions. It is highly resistant to UV radiation, preventing color fading and degradation caused by prolonged exposure to sunlight. Additionally, this coating solution offers excellent corrosion resistance, protecting metal surfaces from rust and deterioration even in highly corrosive environments.
    5. Easy Application: Sherwin-Williams has designed Redend Point for ease of application, catering to both professionals and DIY enthusiasts. The product can be applied using various methods, such as brush, roller, or spray, ensuring flexibility and convenience. Its smooth consistency allows for effortless spreading, resulting in a uniform and professional finish.
    6. Eco-Friendly Formulation: Sherwin-Williams is committed to sustainability, and Redend Point reflects this commitment. The coating solution is formulated with low volatile organic compounds (VOCs), reducing its environmental impact. This eco-friendly approach ensures that Redend Point meets stringent regulatory requirements while providing excellent performance.

    Conclusion:

    Redend Point Sherwin Williams is a game-changer in the coatings industry, revolutionizing the way surfaces are protected and enhanced. With its superior durability, enhanced aesthetics, and resistance to environmental factors, Redend Point offers an unparalleled solution for a wide range of applications. Whether it’s protecting metal structures from corrosion, rejuvenating wood surfaces, or adding a vibrant splash of color to interiors, Redend Point excels in performance, making it the go-to choice for professionals and homeowners alike. With its commitment to innovation and sustainability, Sherwin-Williams continues to shape the future of coatings technology with products like Redend Point.

  • The Best Electrician Company in Wakefield

    The Best Electrician Company in Wakefield

    Electricians in Wakefield are professionals who specialize in electrical installations, repairs, and maintenance. They are skilled in handling various electrical systems, including residential, commercial, and industrial settings.

    Commercial Electrician 

    A commercial electrician is a professional who specializes in electrical work for commercial and industrial buildings. They have the knowledge, skills, and expertise to handle the specific electrical needs and requirements of businesses, offices, retail spaces, factories, and other commercial establishments.

    Some common services provided by electricians in Wakefield include:

    Electrical Installations: Electricians can install new electrical systems, wiring, outlets, switches, and lighting fixtures in homes, offices, or industrial buildings.

    Electrical Repairs: Electricians can diagnose and repair electrical issues such as power outages, faulty wiring, circuit breaker problems, and electrical equipment malfunctions.

    Electrical Upgrades: Electricians can upgrade electrical systems to meet safety standards or accommodate increased power demands. This may involve replacing outdated wiring, upgrading electrical panels, or installing additional outlets.

    Safety Inspections: Electricians can conduct electrical safety inspections to identify potential hazards, ensure compliance with regulations, and recommend necessary upgrades or repairs.

    Lighting Solutions: Electricians can help with lighting installations, including recessed lighting, outdoor lighting, security lighting, and energy-efficient lighting options.

    Electrical Maintenance: Electricians can perform routine maintenance tasks to ensure the smooth operation and longevity of electrical systems. This may include inspecting and testing electrical components, cleaning electrical panels, and replacing worn-out parts.

    Domestic and Commercial Electrician Wakefield:

    • Fast and Reliable service.
    • Qualified, Registered, and Recommended by many.
    • Reasonable and Honest Prices.
    • All costs are clearly discussed with the customer before we start work.
    • Minimal Disruption to your Property

    We are a company that provides electricians to Wakefield and surrounding areas and takes on all work of all aspects. When hiring an electrician Wakefield, make sure they are licensed, insured, and have the necessary qualifications and experience to handle your specific electrical needs. It’s also a good idea to check for customer reviews and testimonials to gauge their reliability and quality of work.

    We are transparent with our prices, so there are no hidden extras. Our prices are fair and very reasonable and we clearly explain them to our clients. No job is too small, whether it’s a complete rewiring of your home or a simple installation of a single light fixture, our team of experienced electricians are here to help.

    Your satisfaction is our priority and we work hard to complete your project with as little interruption as possible.

  • 10 Easy Methods to Declutter Your Home

    10 Easy Methods to Declutter Your Home

    Leading a simplified, uncluttered life can bring about several advantages, including reduced stress, more time and resources to indulge in your hobbies, less cleaning and organising, and a decrease in debt. However, for many, the mere thought of decluttering their living space can be daunting, leading to a feeling of defeat. The truth is that decluttering need not be an arduous task, particularly if you know where to begin.

    If you’re interested in embracing a minimalist lifestyle, here are some straightforward and effortless methods to help you initiate the process of decluttering your home and life.

    Clear One Area Each Day

    Allocate five minutes every day to declutter a distinct area. This could be a drawer, a counter, or even your kitchen cupboards. No matter where you start, make sure you place nothing there that is not actually in use. 

    On the next day, clear another zone and keep it that way until the entire house has been decluttered.  This will take some time, but with a little dedication, you’ll be able to clean the whole place and feel a lot better about it.

    Get Rid of One Item Each Day

    Remove one item from your home each day by donation or disposal. This can be a simple and effective way to declutter your living space. Over time, you will eliminate all useless items in your home, making it more organised and easier to maintain.

    Create a steady and consistent routine that will help you make progress without feeling overwhelmed. As you continue to declutter, you may find that you start to experience a sense of relief and freedom from the burden of unnecessary possessions.

    Fill a Trash Bag

    Get a trash bag and try to fill it as quickly as possible. While you can fill the bag with garbage only, you can also use it to collect items that are still in good condition but are simply no longer needed. These items can be donated to local charities or non-profit organisations, shelters, schools, or community centres.

    Put Your Wardrobe in Order

    To determine the garments you don’t need, place all your clothes on hangers facing in the reverse direction. Once you wear a cloth, return it to the wardrobe with the hanger pointing in the correct direction. 

    After several months, you will be able to tell which clothes you can easily part with and which ones will eventually be put to good use.

    Experiment with Numbers

    Set up a concrete number of clothes to wear for 3 or more months. Thirty pieces of clothing should be enough. However, if this seems insufficient, select another number but do not increase it excessively. After all, the purpose of the experiment is to learn to live with less. 

    Incorporating this method will help you develop a conscious relationship with your wardrobe and learn to appreciate what you have. Also, you’ll save time when it comes to choosing what to wear.

    Make a Plan

    Sit down and create a step-by-step action plan for clearing your home. Each step should be a different area in your home that needs to be decluttered. Start with the easiest one and work your way up to the most difficult. Once you are done with an area, stop and take time to rest and enjoy the results. 

    The good of this method is that it easily fits into any schedule, allowing you to keep track of the areas you have cleared. That way, you can proceed with your project whenever you want.

    Make It Like a Challenge

    Turning your decluttering project into a game can really help you enjoy the process. For example, the 12-12-12 challenge is a fun and exciting way you can utilise to quickly organise your home. 

    Simply find out 12 items to dispose of, 12 items to donate, and 12 items you have borrowed and need to be returned to their proper owners. You don’t need to clear the entire house on your own. Make it a competition between you and your spouse, and see who will complete the challenge quicker.

    Change Your Perspective

    Exploring your home through the lens of a camera can be an eye-opening experience. You may see details that you wouldn’t have noticed before, or you could benefit from having visual documentation of how your living space has changed. 

    Capturing photos of your house can also be helpful when determining what renovations you have to plan for the future. So, arm yourself with a camera and observe your space in a whole new way!

    Use Your Imagination

    If you find it difficult to get rid of a certain item, then ask yourself questions like “Have I used it during the last six months?”, “Would I buy it now? ” and such. If the answer is no, then it is best to let go of the item. Just donate it or sell it.

    This method proves to be quite helpful for people with difficulties removing unneeded stuff.

    The Four-box Method

    This is probably the most used technique when it comes to decluttering. As the name suggests, you will need four boxes. Label them as follows: trash, give away, keep, and relocate. Then go through every room in your home and place each and every item into one of these boxes. Don’t skip an item. 

    While this may take from an hour to weeks, the result will be more than pleasing. Your home will be cleared of unneeded items, and you will feel better looking at the house clutter-free.

    Professional Domestic Cleaning Service

    If the thought of decluttering your home seems daunting, you may want to consider hiring a house cleaning service. These services can assist you in decluttering, organising, and maintaining your space, streamlining the process and reducing stress.

    Professional cleaners have the skills and equipment necessary to tackle even the most cluttered areas, and they can tailor their solutions to meet your specific needs. To get started, simply provide your precise preferences to the service provider.

    Conclusion

    Decluttering your home can seem like a challenging task, but it doesn’t have to be. With these straightforward ways to clear your home, you can take the first step towards a simpler, more uncluttered life. 

    From clearing one area each day to experimenting with numbers and turning decluttering into a game, there are plenty of methods to choose from. With dedication, motivation, and a little assistance, you can transform your living space into a calm, clutter-free haven.

  • How to Grow Mealworms

    How to Grow Mealworms

    Mealworms are a great addition to any compost pile. Not only are they easy to grow, but they produce large numbers and make an excellent fertilizer. A mealworm’s waste also makes a wonderful soil conditioner and can be used directly in your garden. 

    How to grow mealworms? Before you start growing your own, though, be sure you understand the care and feeding that’s involved with a successful home mealworm farm.

    You’ll need a small bin, a food source, bedding, and water. For the bedding, try using bran flakes or whole oats and add a 2-inch layer to your container. Mealworms can’t live without their substrate and rely on it for warmth, nutrition, and hydration. Mealworms are also very sensitive to the environment, so it’s important to keep your worm farm in a dark, warm place that doesn’t smell too bad.

    Ideally, the bin you choose should be shallow and plastic to prevent the worms from chewing through it or climbing on it. You should also use a clear bin so that you can easily see the frass (worm poop) that builds up on the bottom of the container. The worms will eat this sand-like material, and you’ll need to sift it out occasionally to remove dead worms or squirmy beetles. The sifted mealworm “waste” is actually an excellent natural fertilizer, so don’t throw it away! You can add it to your garden or compost pile, or use it to mulch plants.

    To feed your worms, cut up pieces of potato or carrot and scatter them throughout the bedding. Mealworms can also be fed dried grains, such as bran flakes or whole oats. If you decide to use this option, be careful about the type of grain you choose – many chicken feeds contain diatomaceous earth and will quickly kill your worms.

    As the worms eat their way through the bedding, they will leave behind a layer of dark, sand-like waste. This is called frass and is a good sign that your colony is healthy. You can remove this frass and put fresh bedding in as needed.

    Aside from making sure that the containers have plenty of air flow and don’t get too hot, there are few problems associated with mealworms. The biggest problem is mold, which can be caused by too many watery fruits or vegetables, poor ventilation, and extreme humidity. If your colony starts to grow mold, it’s important to remove it and completely clean the container before adding new bedding and worms. Be sure to wipe down the walls and lid of the container with diluted bleach water before you return your worms to it.

  • The PODs for Everyone, ARGUS G and ARGUS POD SE have Officially Arrived in the UK

    The PODs for Everyone, ARGUS G and ARGUS POD SE have Officially Arrived in the UK

    VOOPOO ARGUS G and ARGUS POD SE arrived in the UK and are scheduled to go on sale. These two products are compatible with ARGUS POD cartridges and deliver original taste and flavor.

    ARGUS G, Go Smooth

    VOOPOO ARGUS G is the brand’s first “rectangular stick style” POD that supports MTL to RTL vaping and offers vapers an all-around smooth experience.

    With the 1000mAh built-in battery, which is small in size but large in its battery capacity, ARGUS G provides consistent vaping even with the MAX 25W output and has a maximum charge life of three days and allows for more than 30 puffs even at low power.

    The airflow is increased by the 4-hole air entrance, and the airflow buffer area ensures a smooth flavor. Condensates and poorly atomized e-liquid are stored in ARGUS POD Cartridge to prevent leakage into the pod. It improves heating effectiveness and lengthens coil lifespan to allow vaping using a half-bottle of e-liquid (30ml/bottle).

    The improved OLED screen records five-figure puff counts and display wattage, rest power and coil resistance. Everything is controlled by a single multi-function button, which makes it simple to use. Additionally, ARGUS G offers button ignition and auto draw, enabling users to quickly begin vaping.

    ARGUS POD SE, for Treasured Moments

    In addition to inheriting the ideal flavor and cutting-edge texture, the VOOPOO ARGUS POD SE is a stylish MTL POD with more design options, more usability, and improved cost performance.

    The shiny blue and shiny orange ARGUS POD SE are dynamic and gorgeous. The polished zinc alloy body is natural in lines and the color flows with light and shadow. Meanwhile, the black, red, and brown one retains the zinc alloy and leather materials that are refined in texture and comfortable to grip.

    The ARGUS POD SE is made user-friendly by the auto-draw, step-less airflow adjustment enabling loose MTL to tight MTL, and the side-filling and full-view cartridge. Utilizing GENE.AI 1.2, ARGUS POD SE supports a maximum output of 18W, automatically matches the correct wattage based on coil resistance, and has six safety features that make you reassured with each puff.

    Fully Compatible with ARGUS POD Cartridges

    ARGUS G and ARGUS POD SE share cartridges with ARGUS Z, ARGUS POD, and ARGUS P1 and are compatible with ARGUS POD Cartridges.

    Complete cartridge and device compatibility eases the inventory on retailers. Besides, the wide applicability of cartridges increases customer repurchases and accelerates excess stock clearing off. Customers can also benefit from cost savings while still having an entirely new vaping experience.

    As one of the most important markets for VOOPOO brand development and product sales, there are many fans of the VOOPOO brand and products in the UK, who continue to support the development of the VOOPOO brand. We believe that this new product will also achieve excellent results in the UK!

  • how to tape and mud drywall: A Step-by-Step Guide

    how to tape and mud drywall: A Step-by-Step Guide

    Introduction:

    Taping and mudding drywall is a crucial step in achieving smooth and seamless walls or ceilings. While it may seem intimidating for beginners, with the right techniques and tools, you can achieve professional-looking results. In this step-by-step guide, we will walk you through the process of taping and mudding drywall, ensuring a flawless finish for your next home improvement project.

    Step 1: Prepare the Drywall:

    Before starting the taping and mudding process, ensure that the drywall is properly installed and finished. The drywall seams should be taped and the screws or nails should be countersunk. Any gaps or holes should be filled and sanded smooth.

    Step 2: Apply the Joint Tape:

    Start by applying a thin layer of joint compound along the seam using a 6-inch taping knife. Ensure that the compound extends beyond the width of the joint. Next, press a strip of drywall joint tape firmly into the compound, running it along the entire length of the seam. Smooth out any air bubbles or wrinkles with the taping knife.

    Step 3: First Coat of Joint Compound:

    Using a 10 or 12-inch taping knife, apply a thin layer of joint compound over the taped seam, covering it completely. Feather the edges of the compound to create a smooth transition between the tape and the drywall. Avoid excessive pressure, as it can cause the tape to lift or wrinkle. Allow the compound to dry thoroughly according to the manufacturer’s instructions.

    Step 4: Second and Third Coats:

    Apply a second coat of joint compound, extending it further beyond the first coat to create a wider feathering. Feather the edges to ensure a seamless blend with the surrounding wall. Allow the second coat to dry completely before proceeding to the third coat. The third coat should be applied in the same manner as the second, but with a wider feathering to achieve a smoother finish.

    Step 5: Sanding:

    Once the final coat of joint compound is completely dry, lightly sand the surface using a sanding block or sandpaper to remove any imperfections or high spots. Be careful not to sand too aggressively, as it can damage the surface or create unevenness. Wipe away any dust with a damp cloth.

    Step 6: Corner Bead and Inside Corners:

    For outside corners, install metal or plastic corner bead using joint compound and a taping knife. Apply a thin layer of compound along the corner, press the corner bead into place, and smooth out any excess compound. For inside corners, use a corner trowel to apply joint compound, feathering it out from the corner. Allow the compound to dry thoroughly between coats and sand as necessary.

    Step 7: Final Sanding and Finishing:

    After all the layers have dried, perform a final sanding to ensure a smooth and even surface. Use a sanding block or sandpaper with a fine grit to achieve the desired finish. Wipe away any dust and inspect the surface for any imperfections. Touch up any areas as needed with a thin layer of joint compound, and sand again if necessary.

    Conclusion:

    how to tape and mud drywall: Taping and mudding drywall may seem like a daunting task, but by following these step-by-step instructions, you can achieve professional-looking results. Remember to take your time, allowing each layer of joint compound to dry thoroughly before proceeding to the next. Pay attention to feathering the edges to create a seamless blend with the surrounding drywall. Proper sanding and finishing are essential for achieving a smooth and even surface. Once you have completed the taping and mudding process, you can proceed with priming and painting to achieve a flawless finish that will enhance the appearance of your walls or ceilings. With practice and patience, you can master the art of taping and mudding drywall and create a polished and professional look for your next home improvement project.